Are you looking for healthier, tastier, and more cost-effective alternatives to store-bought baby food? Homemade baby food is not only a great way to provide your little one with fresh and nutritious meals, but it also allows you to cater to their developmental needs and preferences. Let’s get started on how to make homemade baby food.
In a Nutshell:
- Cost-Effective and Eco-Friendly: Making homemade baby food can save you up to 75% compared to store-bought options, while also reducing environmental waste through reusable storage containers.
- Superior Nutrition: Homemade baby food allows you to use fresh, high-quality ingredients, preserving essential nutrients and avoiding preservatives and additives found in commercial baby food.
- Flavor Variety and Control: By making your own baby food, you can introduce a wide range of flavors and textures, helping your baby develop healthy eating habits and a diverse palate from an early age.
The Benefits of Making Homemade Baby Foods
There are so many advantages to making homemade baby food. It’s not only an excellent way to ensure your baby is getting the best possible nutrition, but it also offers a definite edge over commercial baby foods in terms of cost, taste, and control over ingredients.
Imagine the satisfaction of knowing exactly what goes into your baby’s meals, without any added sugar, salt, or preservatives.
Plus, homemade baby food allows you to introduce a wider variety of flavors and textures, helping your little one develop healthy eating habits from the very beginning.
When it comes to cost, homemade baby food can be significantly more affordable than store-bought alternatives.
In fact, many parents find that making their homenade baby food recipes is not only a money-saving option, but also a rewarding and enjoyable experience.
With a little creativity and some basic kitchen equipment, you can whip up delicious and nutritious meals for your baby that will keep both their taste buds and your wallet happy.
Cost-Effective

When you make a homemade baby food recipe, you’re in control of the ingredients and portions, which can lead to significant cost savings compared to store-bought options.
For example, a single jar of store-bought baby food may cost around $1, while making the same amount of homemade baby food puree can be as low as $0.25. That’s a 75% savings!
Plus, when you prepare your homemade baby food, you can buy ingredients in bulk or take advantage of sales and seasonal produce, further reducing your costs.
By preparing and storing homemade baby food in reusable containers, you’re helping to reduce the amount of waste generated by the packaging of commercially made baby foods. So not only are you saving money, but you’re also contributing to a healthier planet for your baby’s future.
Nutritional Value
One of the major advantages of baby food purees is its higher nutritional content compared to commercially baby foods. By using fresher ingredients and avoiding preservatives, you’re providing your baby with nutrient-dense meals that promote optimal growth and development.
For example, a homemade avocado puree is not only a low allergenic food, but also high in healthy fats, while peas are packed with vitamins A and C, iron, protein, and calcium.
The method of cooking can also play a significant role in preserving the nutritional value of the ingredients. Steaming fruits and vegetables, for instance, helps to retain more of their vitamins and minerals compared to boiling them in water.
By making homemade baby food, you have control over the cooking process, ensuring that your baby gets the most nutritional benefits from their meals.
Taste
The taste of homemade baby food is typically far superior to that of commercial baby foods. With fresh ingredients and a wide range of possible flavor combinations, your baby can develop a diverse palate from an early age.
This not only makes mealtime more enjoyable for both you and your baby, but also helps to establish healthy eating habits that will last a lifetime.
By introducing a variety of flavors and textures, you’re helping your baby learn to appreciate and enjoy different types of foods.
For example, exposing your baby to the natural sweetness of fruits like apples and pears or the earthiness of vegetables like butternut squash and sweet potatoes can help them develop a preference for whole, unprocessed foods as they grow older.
The result? A lifetime of healthier eating habits and a genuine appreciation for the flavors of fresh foods.
Control Over Ingredients
Making homemade baby food gives you complete control over what goes into your baby’s meals. This is particularly important for parents who are concerned about potential allergens, additives, or unhealthy ingredients in commercial baby foods.
By preparing your baby’s food at home, you can ensure that they are getting all the essential nutrients they need, without any unwanted extras.
In addition to the peace of mind that comes from knowing exactly what your baby is eating, making homemade baby food allows you to customize meals to suit your baby’s tastes and dietary needs.
You can start with single-ingredient purees and gradually introduce more complex combinations as your baby becomes more comfortable with new flavors and textures. With making baby food recipe at home, the possibilities are truly endless!
Essential Tools for Homemade Baby Foods
Now that you’re familiar with the benefits of making food at home for your baby, let’s discuss the essential tools you’ll need to get started. Investing in a few basic kitchen items will make the process of preparing and storing homemade baby food much easier and more efficient.
Some of the must-have tools for making homemade baby food purees include a blender or food processor, a steamer, and storage containers.
With these items in your kitchen arsenal, you’ll be well-equipped to create delicious and nutritious meals for your little one.
Each of these tools plays an importantl role in simplifying the process of making baby food, from breaking down ingredients into smooth purees to cooking fruits and vegetables in a way that preserves their nutrients, like sweet potatoes or green beans.
By investing in high-quality, versatile tools, you’ll not only save time and effort in the kitchen, but also ensure that your baby’s meals are as healthy and delicious as possible.
Blender or Food Processor for Preparing Baby Food
A high-quality blender or food processor is good for preparing baby food for smooth purees that are easy for your baby to eat. Both blenders and food processors can be used to make baby food, but food processors tend to offer greater versatility, while blenders are more suitable for puréeing.
The key to achieving a consistent, velvety texture lies in choosing the right tool for the job.
When selecting a blender or food processor, look for one that is powerful enough to break down even tough ingredients like raw vegetables and meat.
You may also want to consider investing in a food mill or food grinder, which can be particularly useful for achieving a fine, smooth consistency in recipes that involve tougher ingredients such as chicken or sweet potatoes.
Steamer
A steamer is another indispensable tool for making baby food recipes. Steaming is a popular cooking method for baby food, as it helps to preserve the nutrients in the ingredients while also ensuring that they are cooked through and tender.
In addition to its nutritional benefits, steaming also allows for minimal nutrient loss, and the leftover water can be used as stock for puréeing, further enhancing the flavor and nutritional value of your baby’s meals.
When choosing a steamer, look for one that is easy to use and clean, and that can accommodate a range of different fruits and vegetables. Some models can even be used to cook meats and fish, offering even more versatility in your homemade baby food recipes.
Storage Containers
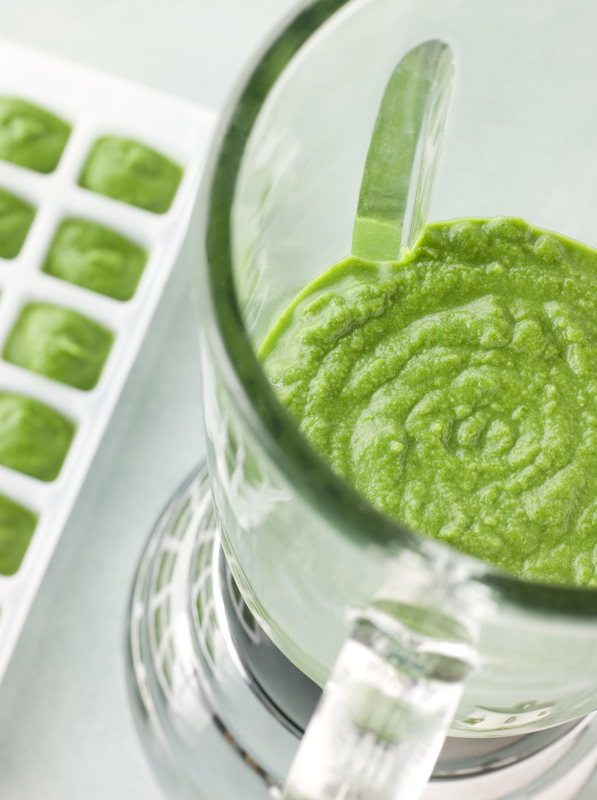
Proper storage is important to make sure that your baby food remains fresh and safe for your baby to eat. Ideally, you’ll want to use airtight containers that can be easily portioned and frozen, such as ice cube trays or small jars for left-over baby food.
These types of containers make it easy to store homemade baby food and serve individual portions of baby food, to make sure that you always have a fresh meal on hand for your little one.
When storing homemade baby food, it’s important to label and date each batch, so you can keep track of what’s in your freezer and make sure that you’re using the oldest food first.
Following proper storage techniques for leftover baby food will help to prevent spoilage and be sure that your baby’s meals are always safe and delicious. Ice cube trays are inexpensive and easy to find on Amazon.
Age-Appropriate Homemade Baby Food Recipes
Now that you know the benefits and tools involved in using homemade baby food let’s dive into some age-appropriate recipes that will help you provide your baby with delicious and nutritious meals tailored to their specific needs.
As babies grow and develop, their dietary requirements change, and it’s important to adjust their meals accordingly.
In this section, we’ll explore recipes for single-ingredient purees, multi-ingredient purees, and chunkier textures and finger foods, all designed to support your baby’s growth and development at each stage.
Remember to always consult your child’s pediatrician before introducing any new foods or flavors, especially if your baby has a history of food allergies or sensitivities.
It’s also a good idea to start with small portions and gradually increase the amount of food you offer as your baby becomes more comfortable with self-feeding and trying new flavors.
Stage 1: Single-Ingredient Purees Recipes (4-6 months)
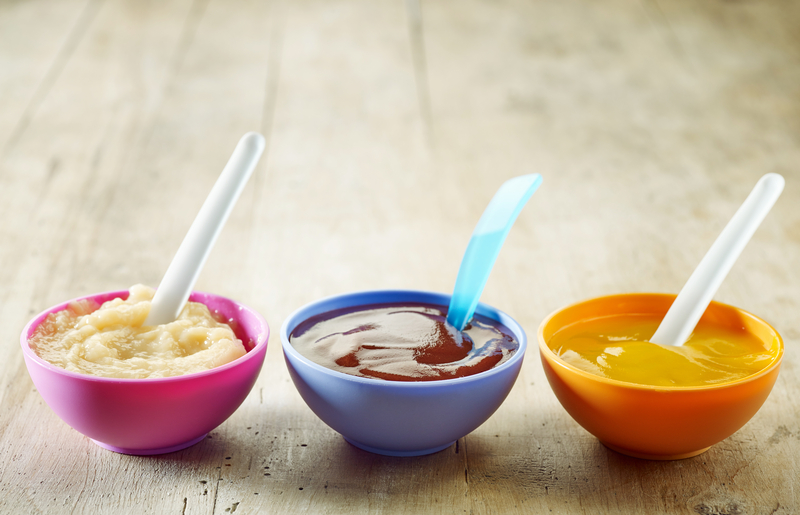
For babies just starting solid foods, single-ingredient purees are the perfect introduction. At this stage, it’s important to focus on offering a variety of fruits, vegetables, and proteins to help your baby become accustomed to different tastes and textures.
Some easy and nutritious solid foods options for single-ingredient purees include apple, pear, and carrot purees. To prepare these purees, simply steam or cook the fruit or vegetable until tender, then blend in a food processor or blender until smooth.
Remember to always introduce one new food at a time, and wait at least 3-5 days between each new food to monitor for any signs of an allergic reaction.
If your baby tolerates the new solid foods well, you can gradually increase the variety of ingredients in their meals, ensuring a well-rounded diet that supports their growth and development.
Stage 2: Multi-Ingredient Puree Recipe (7-9 months)
As your baby becomes more comfortable with single-ingredient purees, you can begin to introduce more complex solid foods combinations that incorporate multiple ingredients.
These multi-ingredient purees offer a broader range of flavors and nutrients, helping your baby develop a more diverse palate. Some tasty and nutritious examples of multi-ingredient purees include sweet potato and spinach or peas and chicken.
To prepare these recipes, simply cook the ingredients until tender, then blend them together in a food processor or blender until smooth.
When introducing multi-ingredient purees, it’s still important to observe the same allergy precautions as with single-ingredient purees, introducing one new ingredient at a time and waiting 3-5 days between each new food to monitor for any signs of an allergic reaction.
Stage 3: Chunkier Textures and Finger Foods (10-12 months)
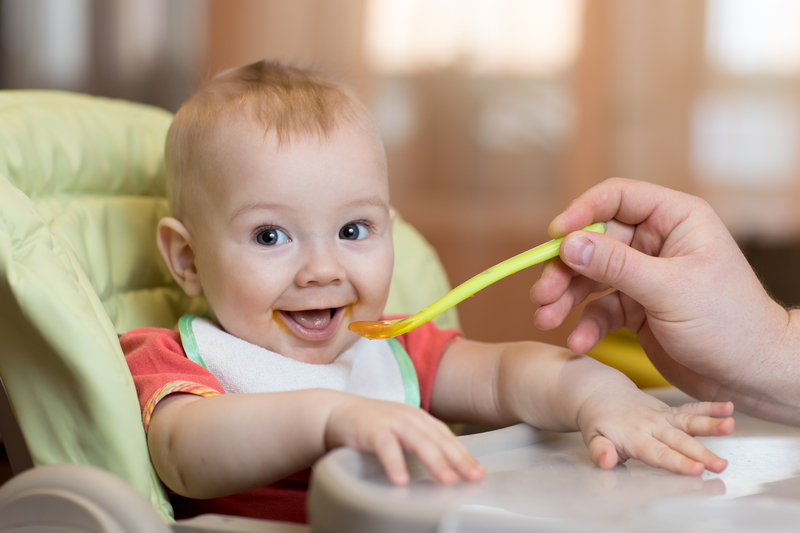
As your baby approaches their first birthday, they’ll likely be ready to explore chunkier textures and finger foods. This stage is all about helping your baby develop their oral motor skills, encouraging self-feeding, and expanding their range of tastes and textures.
Some examples of thicker-textured recipes and finger foods include mashed avocado and banana or soft-cooked vegetable pieces.
When introducing these more advanced foods, it’s important to continue monitoring for any signs of an allergic reaction and to ensure that the foods are soft and easy for your baby to chew and swallow.
Always supervise your baby during mealtime to prevent choking and encourage a positive, enjoyable eating experience.
More Homemade Baby Food Recipes
Sweet Potato and Carrot Purée (6-8 months)
Ingredients:
- 1 medium sweet potato
- 2 medium carrots
- Water or breast milk/formula (optional, for thinning)
Instructions:
Peel and chop the sweet potato and carrots into small pieces. Place the chopped sweet potato and carrots in a steamer basket over boiling water. Cover and steam for about 15-20 minutes, or until both vegetables are tender. Transfer the steamed vegetables to a blender or food processor. Blend until smooth, adding water, breast milk, or formula if needed to achieve the desired consistency.
Let the purée cool before serving it to your baby. Store homemade baby food and any leftovers in an airtight container in the refrigerator for up to 3 days, or freeze for up to 3 months.
Avocado and Banana Mash (4-6 months)
Use the recipe after you have already introduced banana to your baby.
Ingredients:
- 1 ripe avocado
- 1 ripe banana
Instructions:
Cut the avocado in half, remove the pit, and scoop out the flesh into a bowl. Peel the banana and slice it. Using a fork, mash the avocado and banana together until smooth. For a thinner consistency, you can add a little breast milk, formula, or water.
Serve the mash immediately. If you have leftovers, store them in an airtight container in the refrigerator for up to 1 day. (Note: The avocado may brown slightly, but it is still safe to eat.). Use ice cube trays to save leftover baby food in the freezer.
These recipes are simple, nutritious, and perfect for introducing your baby to new flavors and textures.
Tips for Introducing New Foods and Flavors
The process of introducing new foods and flavors to your baby can be both exciting and challenging, as you help them discover the wonderful world of taste and texture. For a smooth and successful transition to solid foods, it’s important to follow some simple guidelines that will help you safely and effectively introduce new ingredients to your baby’s diet.
Allergy Precautions
Introducing potential allergens to your baby’s diet can be a source of concern for many parents. To minimize the risk of an allergic reaction, it’s important to introduce potential allergens one at a time, allowing at least 3-5 days between each new food to monitor for any signs of a reaction.
This approach will help you identify any problematic ingredients and make any necessary adjustments to your baby’s diet.
If your baby does experience an allergic reaction, such as a rash, hives, or difficulty breathing, it’s important to contact your child’s pediatrician immediately for guidance on how to proceed.
Remember, every baby is different, and what may be harmless food for one child can be a potential allergen for another.
By taking a cautious approach to introducing new foods and flavors, you can help ensure a safe and enjoyable eating experience for your little one.
Signs of Readiness
As your baby grows and develops, they will reach certain developmental milestones that indicate they are ready for more complex or textured foods.
Some signs of readiness to look for include good head and neck control, the ability to sit upright with minimal support, reaching and grabbing objects, showing interest in food, and opening their mouth when offered food on a spoon.
By carefully observing your baby’s progress and adjusting their meals accordingly, you can be sure that they are receiving the appropriate nutrition for their age and developmental stage.
Always consult your child’s pediatrician before introducing any new foods or flavors, and remember that patience and persistence are key when it comes to helping your baby develop a love of healthy, delicious foods.
Serving and Storing Homemade Baby Food
Proper storage and serving techniques are essential for ensuring that your baby food remains fresh, safe, and appealing to your baby.
In this section, we’ll provide tips on how to store and serve your freshly made baby food, including proper storage techniques and reheating instructions.
Storage Techniques
When it comes to storing baby food, proper techniques are crucial for maintaining freshness and preventing spoilage. Using airtight containers, such as ice cube trays or small jars, allows you to portion and freeze baby food for later use.
This not only makes mealtime more convenient, but also helps to reduce waste.
When storing baby food, it’s important to label and date each batch so you can easily keep track of what you have on hand and ensure that you’re using the oldest food first.
Following these storage techniques will help ensure that your baby’s meals are always fresh, delicious, and safe to eat.
Reheating Instructions
When it’s time to serve fresh made baby food, proper reheating is essential for ensuring that the food is safe and enjoyable for your baby.
To safely thaw and reheat frozen baby food, place it in the refrigerator overnight or in a bowl of cold water for a few hours, avoiding the use of a microwave for thawing.
Once the baby food is thawed, you can reheat it in the microwave or on the stovetop until it’s hot throughout, stirring to eliminate any hot spots.
Allow the food to cool slightly before serving, and always check the temperature to ensure that it’s safe and comfortable for your baby to eat.
Circling Back Around
So go ahead and explore the world of homemade baby food – your baby’s taste buds (and your wallet) will thank you!making homemade baby food is a rewarding practice that not only ensures your baby receives the best possible nutrition but also offers significant cost savings and the ability to control ingredients and flavors. By investing in the right tools and following age-appropriate recipes, you can create delicious, nutritious, and diverse meals that support your baby’s growth and development. Setting the stage for a lifetime of healthy eating habits and a strong foundation for your baby’s future well-being.
Frequently Asked Questions About Homemade Baby Food
What do I need to make my own baby food?
To make homemade baby food, you will need a blender, water, formula, or breastmilk, a knife for chopping produce, a spoon, bowls, an ice cube tray, freezer bags, and baby food storage containers.
What to avoid in DIY baby food?
It’s best to avoid giving them honey or foods containing honey, light or dark corn syrups, unpasteurized dairy, and undercooked meats, eggs, fish, and poultry.
Is it okay to make DIY baby food?
It is safe to make homemade baby food for your infant, provided you take certain precautions and ensure the food is prepared properly. While there are benefits to making your own, it is recommended to begin with store-bought varieties before introducing homemade foods. With a little care and attention, baby food made at home can be a nutritious option for your little one.
Is homemade baby food cheaper?
Overall, making your own baby food is cheaper than purchasing store-bought versions. Not only do you save money on the cost of ingredients, but you also have the assurance that your baby is eating healthy food with no unnecessary additives or preservatives.
What do I need to make my homemade baby food?
Creating your homemade baby food is easy and requires a few simple supplies. You will need a blender, knife, spoon, bowls, an ice cube tray, freezer bags, baby food storage containers, a hand-turned food mill, baby food grinder, sieve or strainer, and an all-in-one baby food maker.